The point system
There is a point system is the Zombie game mode. This system applies to Normal Zombies, Hellhounds, Crawler Zombies, Space Monkeys, Pentagon Thief, and George A. Romero
- Non-lethal hit: 10 points.
- Lethal torso hit: 60 points.
- Lethal limb hit: 50 points.
- Lethal neck hit: 70 points.
- Lethal headshot: 100 points.
- Lethal melee: 130 points.
- Lethal grenade: 50 points.
- Non-lethal grenade: 10 points.
- Knifing or Shooting George: 10 points.
Pack a Punch
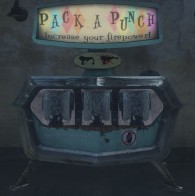
Der Riese: The Pack-a-Punch Machine is inaccessible blocked by a door and can be unlocked by turning on the power. Then, all three teleporters must be linked to the mainframe back in the starting room, where the Pack-a-Punch Machine is located. As each teleporter is linked, the door blocking the machine goes down. Once all the teleporters were linked, the player will be able to use the machine.
The Pack-a-Punch machine is accessed by turning on the power, then connecting the teleporter to the mainframe in the spawn room as the Pack-a-Punch Machine is located in the room the teleporter takes the player to. The player has to relink the teleporter after every use to get to the Pack-a-Punch machine. Before it can be relinked, it has to cool down. Five: The Pack-a-Punch Machine is accessible by hitting all five DEFCON switches in the war room after the power is turned on to decrease the DEFCON level to 5. After that, the panic room (the conference room), where the Pack-a-Punch Machine is located, is accessible by going through any teleporter. After 30 seconds, the door of the panic room will open, allowing the players to enter or leave the room directly. However, after the doors are opened, the Pack-a-Punch Machine will disappear. Also, after every player has left the panic room, the doors will close, and the player must reset the DEFCON once again.
Ascension: The Pack-a-Punch Machine is accessible by turning on the power and using all three Lunar Landers. When each lander is used, one third of the diagram of the rocket (shown in the Spawn room as well as the power room) will turn green. After all three are used, the diagram will be completely green, signifying that the rocket is ready to be launched. The player must then go back to where the power switch is located at the top of the main building and launch the rocket. Once the rocket is launched, the door blocking the room below the rocket will open, making the Pack-a-Punch Machine accessible to the player.
Call of The Dead: Once the power has been turned on, after a short amount of time the screen will flash orange and the the lighthouse light will start to spin erratically, it will eventually settle and point to where the Pack-a-Punch machine has spawned. The Pack-a-Punch machine will always be found in a water. Each spawn point is indicated by a large boulder that will sink into the ground and reappear as the Pack-a-Punch machine when it spawns there except for one, where it will spawn right out of the water next to Quick Revive. After some time, the Pack-a-Punch machine will disappear and respawn somewhere else.
Perks
Jugger Nog

Juggernog is considered by many players to be the most important perk except for Quick Revive in solo. The reason for this is that it makes it much easier to survive because normally you will be downed in 2 hits but with this you can survive 4 hits, which makes it much easier to survive.
Locations
Trivia
Locations
- Verrückt - Starting room (German side).
- Shi No Numa - It will spawn randomly in a hut that is opened.
- Der Riese - The perk is down a path to the left of the Bouncing Betty purchase.
- Kino der Toten - In the theater on the left side through the main doors, next to the Bowie Knife.
- Five - Downstairs in the war room, next to the door that leads to the Pack-a-Punch Machine room.
- Ascension - The middle staircase after you buy the room that leads in the MPL room. Entrance is right next to the PM63.
- Call of the Dead - In the hull of the ship.
Trivia
- As with all the Perk-a-Cola machines, you can see the price is 10 cents, however this has nothing to do with its price in-game.
- The jingle for Juggernog is the only jingle that is sung by a female.
- It's name is taken from the drink "Eggnog" and probably has a similar taste (although no character comments on the taste)
- The characters tend to remark on the singer of the jingle, in particular Dempsey.
- Nikolai can be heard singing the jingle, replacing 'Juggernog' with 'Vodka' while purchasing the perk in Kino der Toten.
- Juggernog is the only perk machine that is 2500 points.
Quick Revive
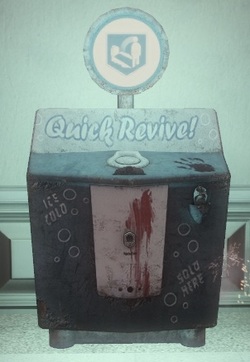
Quick Revive Soda is an obtainable perk in Call of Duty: World at War and Call of Duty: Black Ops that is featured in the Zombies game mode. Quick Revive costs 1500 points, making it one of the cheapest perks in the game. InWorld at War, this perk is virtually useless while playing solo, but the MOST useful in multiplayer since when you or a teammate is downed,you or your teammates are revived much faster than normal.
In Black Ops, this perk was given a more useful role while playing solo. It can be bought for 500 points and with the power switched off. When the player falls down, they will be equipped with a Mustang & Sally (unless the player has a Ray Gun or Winter's Howl) and will be free to shoot the zombies while they are down. The zombies will walk away from the player while they are reviving themselves. After use, the perk must be bought again and can be purchased three times before the machine disappears.
Locations
Tactics
Trivia
In Black Ops, this perk was given a more useful role while playing solo. It can be bought for 500 points and with the power switched off. When the player falls down, they will be equipped with a Mustang & Sally (unless the player has a Ray Gun or Winter's Howl) and will be free to shoot the zombies while they are down. The zombies will walk away from the player while they are reviving themselves. After use, the perk must be bought again and can be purchased three times before the machine disappears.
Locations
- Verrückt - Starting room (American side).
- Shi No Numa - Spawns when a hut is opened.
- Der Riese - Dr Maxis' office.
- Kino der Toten - Starting room.
- Five - Starting room.
- Ascension - Starting room.
- Call of the Dead - Starting room.
Tactics
- This perk is handy to purchase if the player also has a distraction device (such as Monkey Bombs or the Gersch Device) as they can pick up multiple players while the zombies are distracted.
- It is effective to buy Quick Revive if the player's entire team is camping in one area and the player is normally in the back of the formation, allowing them to revive a teammate downed in front of them quickly.
- On Ascension, solo players should buy Quick Revive before rounds 5-7 (The Space Monkey rounds). When the Monkey Round starts, camp at the Quick Revive machine, and knife the monkeys as they come to attack the machine. If the machine is unharmed, the player will get both Max Ammo and a free random perk.
- When playing Solo on Kino der Toten, if half between Quick revive and Juggernog and only having 2500 points after getting downed, head for juggernog as it takes more hits for a Zombie to hit you and Quick Revive is limited.
Trivia
- This Quick Revive is similar to the Second Chance perk but the time needed to revive a player with Quick Revive is a little slower than Second Chance
- According to the characters, this perk tastes like fish.
- Every Zombies Character seems to dislike the fishy taste of the Quick Revive, apart from Takeo who remarks its nice taste, a stereotype associating the Japanese with sushi, which is raw fish. Tank Dempsey particularly dislikes this perk, as he hates fish.
- There is a bloody hand print on the machine, possibly implying someone tried to get a Quick Revive before dying.
- The icon for Quick Revive is a grave with a man standing up from it. The background is blue, with the main picture being white.
- In GKNOVA6, one of the screens shows Quick Revive where Speed Cola should be on "Five".
- This Perk-a-Cola has the shortest jingle.
- In Solo, even after it has disappeared, running into the spot where it usually is will still result in the sound of Perk-A-Cola bottles shaking around.
- Once you have expended the three solo revives and the machine dissapears, you cannot receive another quick revive from Random Perk Bottles, even if you have all other perks.
- On solo, when a player gets back up using Quick Revive they can receive the points that would normally be awarded for reviving a team mate..
- Quick Revive is the only Perk-A-Cola that doesn't resemble a drink in real life.
- When paired up with Juggernog , you can revive your teammates quick and can still take a few hits as well.
Speed Cola
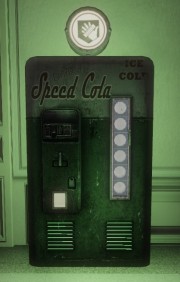
Speed Cola is an obtainable perk in Call of Duty: World at War and Call of Duty: Black Ops that is featured in the Zombies game mode. Speed Cola is similar to the multiplayer perk Sleight of Hand, both of which decrease the time it takes to reload by 50%. It also increases the speed in which players repair windows by 60%.
It costs 3000 points to buy, making it the most expensive of all perks. It's effect is most useful and noticeable on weapons with slow reload times, such as LMGs, Shotguns, and Wonder Weapons. The vending machine from which Speed Cola is purchased has a green and white color scheme.
Locations
Trivia
It costs 3000 points to buy, making it the most expensive of all perks. It's effect is most useful and noticeable on weapons with slow reload times, such as LMGs, Shotguns, and Wonder Weapons. The vending machine from which Speed Cola is purchased has a green and white color scheme.
Locations
- Verrückt - In the room between the right balcony and the dressing room.
- Shi No Numa - Will spawn randomly in one of the four huts.
- Der Riese - In the right-middle area of the map, near to where the FG42 can be purchased.
- Kino der Toten - In the room where the MP40 and Stakeout can be purchased next to the dressing room.
- Five - On the first floor near the elevator on the left.
- Ascension - Near the Lunar Lander closest to the rocket and the Pack-a-Punch machine; located near the top of the stairs where the M16 is.
- Call of the Dead - Behind the lighthouse, go to the bottom of the light house, and go towards the stamin-up machine, but make a right, and down the slope.
Trivia
- The name indicates that it tastes like cola.
- There is a rare glitch that occurs on Verruckt, where after the power is turned on, the Speed Cola vending machine isn't active.
- You can see the soda bottles in the machine. The others are the PhD Flopper and the Stamin-Up. The bottles do not move when the machine is used.
- Richtofen shows a particular fondness for this Perk-a-cola, constantly praising it's taste.
- Speed Cola is a play on words of Coca Cola.
Root Beer
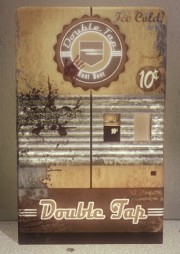
Double Tap Root Beer, increases the rate of fire of all weapons by approximately 33% and is based on the Multiplayer Perk Double Tap. It also removes the firecap on semi auto weapons on the iPhone version of Zombies. It costs 2000 points. It can be seen as a risky perk, as it increases rate of fire and Bouncing Betty speed like Double Tap, however many weapons have high rates of fire anyway. This can cause ammo to be drained at an alarming rate if not used properly. This effect is the most noticeable on weapons like Submachine guns, which often have a high rate of fire. The effect is also amplified by thePack-a-Punch Machine as many of the upgraded weapons gain an increased rate of fire.
On the other hand, it can make it easier to put bullets into enemies faster, thus killing them fast. It is also very useful to have the Speed Cola perk, because of the fast depletion of a magazine. Many people believe Double Tap to be "a waste of ammo, and a disadvantageous perk", though this isn't necessarily true. Double Tap may not be helpful in the early rounds, but in the later rounds it is very helpful. Double Tap simply increased the rate of fire of a weapon, thus killing quicker. It does not actually physically use more ammo (though weapon recoil is higher and ammo may be wasted if a player's aim isn't good, or they release the trigger too late).
Double Tap Root Beer is beneficial for players that are using pump-action shotguns, or on other weapons that are slow (such as the HK21, the BAR, etc.) which have a low, or manual fire rate. This allows the player to spray a volley of bullets into a crowd of zombies at a fast rate, and when combined with Speed Cola to decrease reloading time, benefits users of the M1897 Trenchgun or the Stakeout.
It is quite odd that Double Tap affects fire rate when you drink it, due to the fact that when the character consume one of the perk drinks, it should somehow affect the player only and in no possible way affect the gun function itself. A possibly theory to this is that the player presses the trigger faster, rather than let an automatic weapon fire on its own.
Locations
Trivia
On the other hand, it can make it easier to put bullets into enemies faster, thus killing them fast. It is also very useful to have the Speed Cola perk, because of the fast depletion of a magazine. Many people believe Double Tap to be "a waste of ammo, and a disadvantageous perk", though this isn't necessarily true. Double Tap may not be helpful in the early rounds, but in the later rounds it is very helpful. Double Tap simply increased the rate of fire of a weapon, thus killing quicker. It does not actually physically use more ammo (though weapon recoil is higher and ammo may be wasted if a player's aim isn't good, or they release the trigger too late).
Double Tap Root Beer is beneficial for players that are using pump-action shotguns, or on other weapons that are slow (such as the HK21, the BAR, etc.) which have a low, or manual fire rate. This allows the player to spray a volley of bullets into a crowd of zombies at a fast rate, and when combined with Speed Cola to decrease reloading time, benefits users of the M1897 Trenchgun or the Stakeout.
It is quite odd that Double Tap affects fire rate when you drink it, due to the fact that when the character consume one of the perk drinks, it should somehow affect the player only and in no possible way affect the gun function itself. A possibly theory to this is that the player presses the trigger faster, rather than let an automatic weapon fire on its own.
Locations
- Verrückt - Right next to the MP40 purchase, German side.
- Shi No Numa - Will spawn randomly in one of the four huts.
- Der Riese - Near the bridge that is lowered when you activate the power.
- Kino der Toten - In the alleyway.
- "Five" - In the War Room next to the first elevator.
- Call of the Dead - Located on the deck.
Trivia
- According to Dempsey, this perk tastes "chewy". This may be because the roots aren't ground.
- Double Tap affects the Death Machine on Five and Call of the Dead , causing it to fire at 1600 RPM instead of 1200.
- Double Tap also affects weapon priming, repairing windows, and placing Bouncing Betties or Claymores .
- Originally, it was supposed to appear in Ascension, according to soundfiles.
- When using Double Tap with the PPSh or the Famas the fire rate of the weapon will be increased so greatly that the sound of the bullets firing will "blur" creating a single continuous sound.
- In Der Riese, Edward Richtofen doesn't appear to like the Double Tap Root Beers jingle. But in Kino der Toten, you will hear him sing his own version of the jingle.
- Double Tap did not appear in Ascension, but it returns in Call of the Dead.
Stamin up
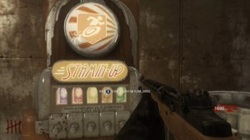
Stamin-Up is a Perk-a-Cola perk new to Nazi Zombies, along with PhD Flopper, that is exclusive to the maps Ascension and Call of the Dead. It increases the player's movement speed and sprint duration, being a cross between the perks Lightweight and Marathon. It also gives the effect of Scout Pro, decreasing your weapon draw time. On Ascension, it is located near the AK-74u, towards one of the Lunar Lander launch pads and Claymores. On Call of the Dead, it is located inside of a house behind the lighthouse.
The cost of this perk is 2000 points. This perk is most useful when the player will be running around the map either as their strategy or if they are in danger and being chased by a massive horde of zombies. Alternatively it is good when attempting to defend more than one Perk-a-Cola machine during a space monkey round. It also comes in handy if the player is playing on their own or in a small team or if one is trying to avoid George A. Romero.
Location
Trivia
The cost of this perk is 2000 points. This perk is most useful when the player will be running around the map either as their strategy or if they are in danger and being chased by a massive horde of zombies. Alternatively it is good when attempting to defend more than one Perk-a-Cola machine during a space monkey round. It also comes in handy if the player is playing on their own or in a small team or if one is trying to avoid George A. Romero.
Location
- Ascension - Located past the gates to the left of the upper spawn door. It is in the back of the alleyway past the door (1000 points) leading to the launch pad, next to a spawn point of the Mystery Box.
- Call of the Dead - Behind the lighthouse and over an ice glacier.
Trivia
- The perk's name is a play on words of 7-Up, the popular soda, and the word 'stamina'.
- According to in game characters, Stamin-Up has a sour taste.
- Even though the perk machine says that it is available in multiple colors (including purple, blue, red, orange, yellow, and green, coincidentally all the colors of every other available perk), you can only receive the yellow colored drink.
- The shape for the Stamin-Up perk machine looks like the shape of the removed perk machine Amm-O-Matic
PhD Flopper
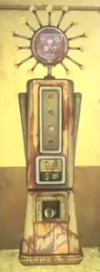
PhD Flopper (sometimes referred to as Dr. Flopper) is a Perk-a-Cola perk new to Nazi Zombies, along with Stamin-Up, that are exclusive to the map Ascension from the First Strike DLC, and the map Call of the Dead from the Escalation DLC, costing 2000 points to buy and has a dark blue and purple color scheme. PhD Flopper completely negates explosive and fall damage. However, the player will still groan when falling down from an elevated area. Also, when players dive to prone from a distance from which they normally would take fall damage, they produce a explosion, similar to a "nuke". The "nuke" loses its ability to kill with one hit from round 20+.
A good strategy for using PhD Flopper to its best effect on Ascension is to just buy it early on and then keep diving to prone near where the perk machine is found. By doing this it is possible to get to round 20 with minimal use of ammunition. However, as this is an explosive "weapon", it should be noted that the player only receives 50 points from each kill, when opposed to the 70 points that are acquired by using a bullet firing weapon, so using a gun would be advised if the player is going to buy something, such as other perks. This perk though doesn't seem to work when diving right on top of multiple zombies. It should also be noted that is generally advisable to dive to prone away from any teammates, as landing on one will down both players.
On Ascension, PhD Flopper is located near Lunar Lander D ( Д ), with the grenades available to purchase off the nearby wall.
On Call of the Dead, PhD Flopper is located in a multi-story building that branches off of the lighthouse. This location is the ultimate destination of the Flinger (Catapult).
Trivia
Location
A good strategy for using PhD Flopper to its best effect on Ascension is to just buy it early on and then keep diving to prone near where the perk machine is found. By doing this it is possible to get to round 20 with minimal use of ammunition. However, as this is an explosive "weapon", it should be noted that the player only receives 50 points from each kill, when opposed to the 70 points that are acquired by using a bullet firing weapon, so using a gun would be advised if the player is going to buy something, such as other perks. This perk though doesn't seem to work when diving right on top of multiple zombies. It should also be noted that is generally advisable to dive to prone away from any teammates, as landing on one will down both players.
On Ascension, PhD Flopper is located near Lunar Lander D ( Д ), with the grenades available to purchase off the nearby wall.
On Call of the Dead, PhD Flopper is located in a multi-story building that branches off of the lighthouse. This location is the ultimate destination of the Flinger (Catapult).
Trivia
- Landing on top of zombies renders the effect of this perk ineffective.
- The perk's name is likely to be a play on the name of the popular soft drinks Dr. Pepper or Dr. Perky and the word "PhD" (Doctorate of Philosophy).
- The machine itself branches from the perk icon. While the other Perk-a-Cola machines follow their relevant drink's color in glow and theme, PhD Flopper's machine glows yellow, whilst the perk icon is a dark purplish color.
- The PhD Flopper seems to be made from prunes. This is supported from Dempsey's Quote "I can't stand prunes!" after drinking it, which would explain its dark purple color. This is a reference to an urban myth that Dr. Pepper contains prune juice.
- The word 'Flopper' in the perk name may stand for the fact that you have to dive or 'belly flop' to activate the perk's effect.
- This is the first Zombies perk to directly affect the zombies.
- PhD Flopper's jingle is the only one of the Perk-a-Cola machine jingles that directly mentions the zombies.
- When acquiring this perk, it makes it the first time you can overcook a grenade without dying, or even getting hurt without cheating.
Location
- Ascension - Near from the northern Lunar Lander.
- Call Of The Dead - In the abandoned room under the lighthouse.
